Services
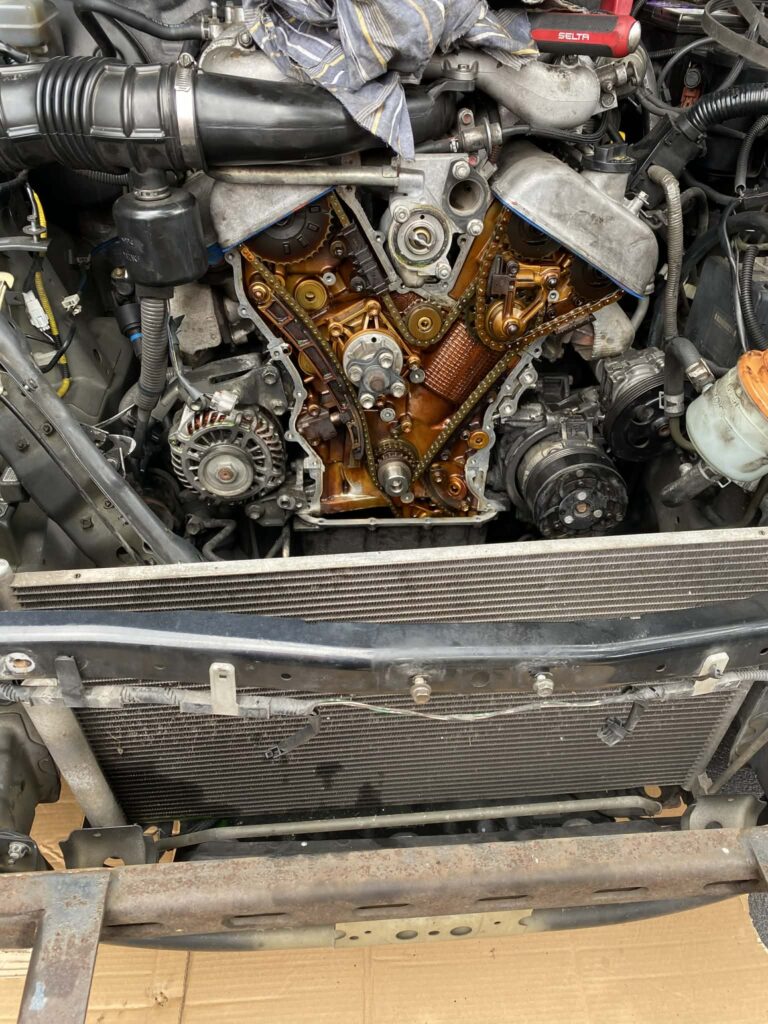
Replacing Timing Chain Assembly
Preparation: Disconnect the battery, drain the oil and coolant, and remove necessary components (accessory belts, engine covers).
Locate & Access: Remove the timing chain cover. Note that some engines require removing the engine/gearbox entirely, as the chain is at the back.
Set Timing: Rotate the engine to top dead center (TDC) so that the crankshaft and camshaft timing marks align, as specified by the manufacturer.
Remove Old Components: Lock the camshafts and crankshaft. Remove the tensioners, guides, and old chains.
Install New Kit: Install the new chain, tensioners, and guides, ensuring the alignment marks match perfectly.
Reassemble: Clean all sealing surfaces, apply new gasket sealant, and reassemble the engine.
Top Overhaul
Cylinder Head & Gasket: Removed, cleaned, and resurfaced to fix leaks or warping.
Gaskets: Installation of a new head gasket and valve cover gaskets to prevent leaks.
Valves & Valve Seals: Inspected, ground, or replaced to fix smoking or low compression.
Piston Rings: Replaced to address oil burning.
Timing Components: Serviced or replaced as necessary.

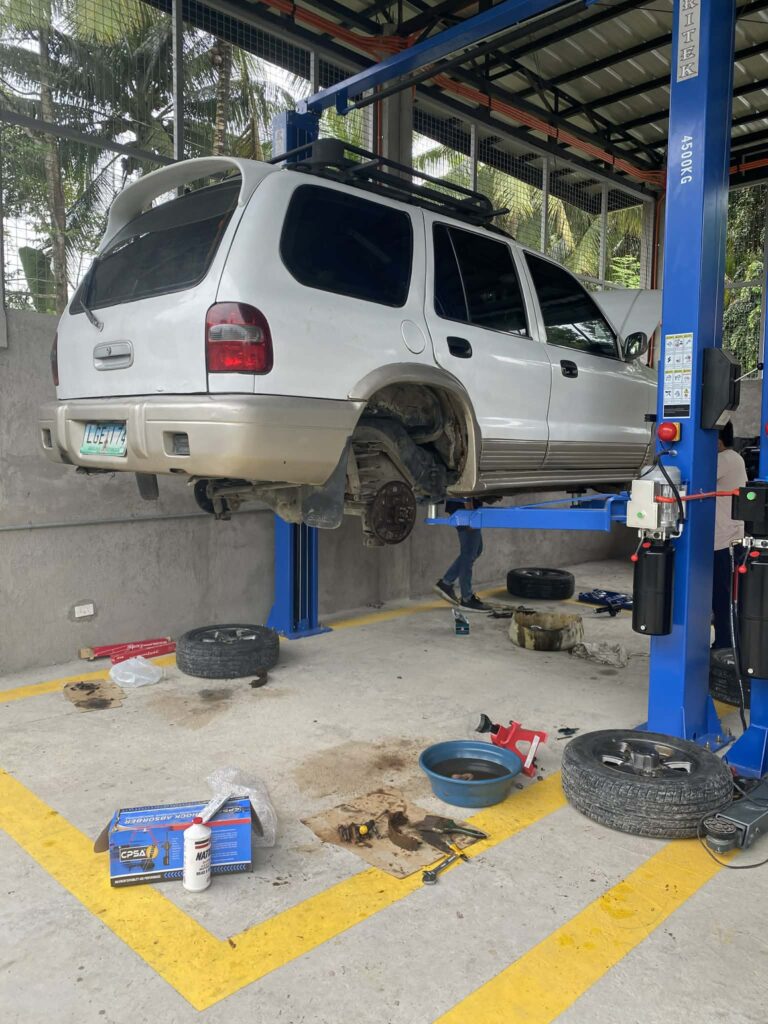
Replacing Rear Wheel Bearing Hub Assembly
Clean Surface: Use a wire brush to clean the mounting surface on the axle/knuckle of all rust and debris.
Apply Anti-Seize: Apply a thin coat of anti-seize to the mounting surface to prevent future corrosion.
Install New Hub: Slide the new hub assembly into place, aligning it correctly (especially for ABS sensors).
Torque Bolts: Reinstall the hub bolts and torque them to specification in a cross pattern.
Reassemble Brakes: Reinstall the rotor, caliper bracket, brake pads, and caliper, using thread locker on bolts if recommended.
Reconnect ABS/Axle Nut: Reconnect the ABS sensor. If an axle nut was removed, torque it to specification.
Final Steps: Reinstall the wheel, lower the vehicle, and torque the lug nuts to specification.
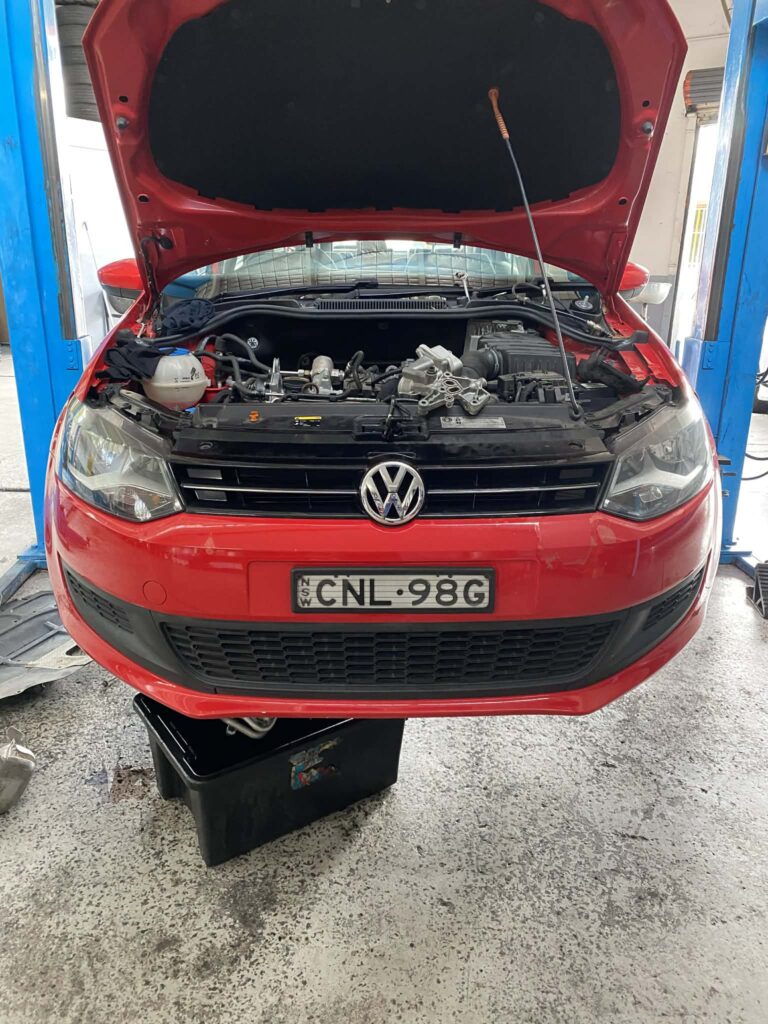
Replacing Alternator Belt and Tensioner Assembly
Remove the Belt: Locate the automatic tensioner pulley. Use a breaker bar or socket wrench on the tensioner pulley bolt to rotate the tensioner, relieving pressure on the belt. Slip the belt off.
Remove/Replace Tensioner: Remove the bolts (often 2 or 3) holding the tensioner assembly to the engine. Install the new tensioner assembly, ensuring it sits properly on the mounting surface. Tighten the bolts to the correct specification.
Install the New Belt: Route the new belt around all pulleys, referring to the diagram. Keep the belt taut, leaving the tensioner pulley for last.
Apply Tension: Use the wrench to turn the tensioner pulley again, slide the belt over it, and slowly release the tensioner to apply pressure to the belt.
Final Checks: Ensure the belt is properly seated in all pulley grooves. Start the engine and listen for squealing, which indicates incorrect tension or improper routing.
Wheel balancing
Eliminates vibrations: Corrects shaking felt in the steering wheel or vehicle at certain speeds.
Promotes even wear: Ensures the entire tire surface contacts the road for uniform tread wear.
Extends tire life: Prevents premature wear from disproportionate pressure.
Improves safety & comfort: Leads to a smoother ride and better steering control.
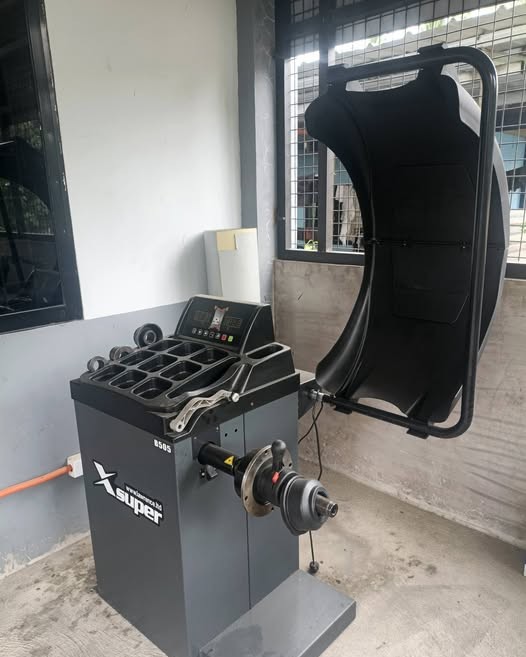
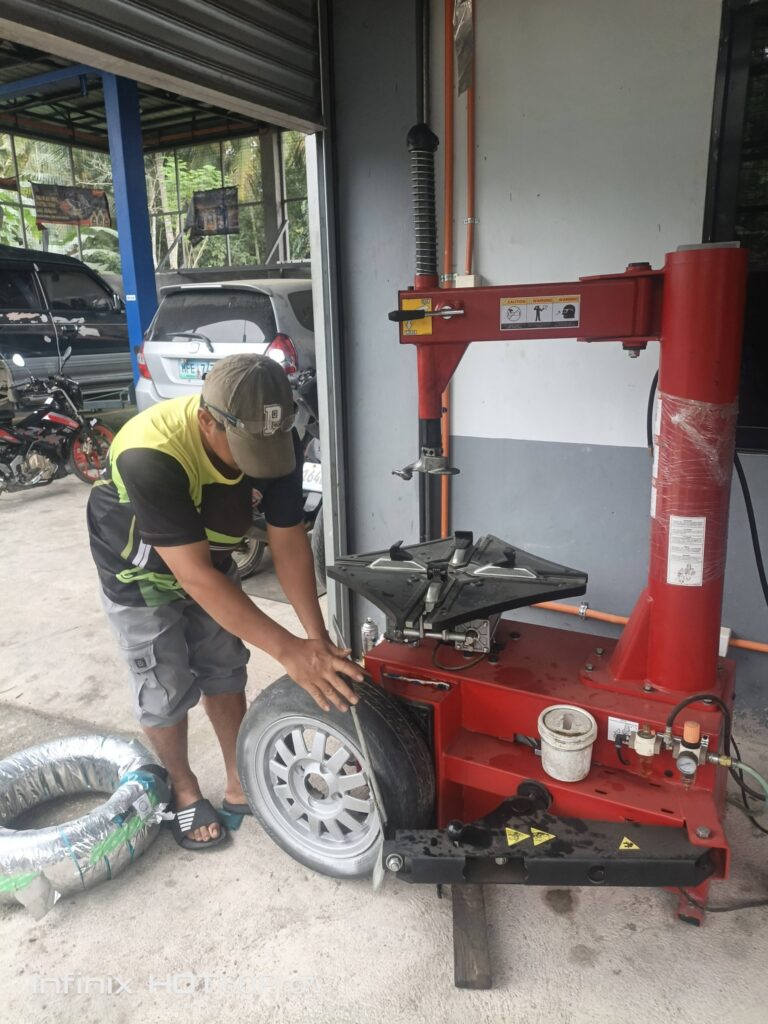
Tire Changer
Bead Breaking: A side-mounted shovel or paddle breaks the tight seal between the tire bead and the rim.
Mounting/Demounting: A specialized mount/demount head (duck head) lifts the tire bead over the rim flange to remove or install it.
Secure Clamping: Adjustable jaws or clamps, operated by foot pedals, hold the wheel rim securely from the inside or outside to prevent movement.
Rotation: A powered turntable rotates the wheel, allowing the operator to easily guide the tire on or off.
Inflation: Many models include an integrated air hose and gauge to inflate the tire once mounted.
What to Expect
Personalized Approach
Every project is unique, and I tailor my approach to fit your specific needs and goals.
Clear Communication
I keep you informed at every stage of the process and provide you regular updates.
After Support
My commitment to your success doesn't end at launch. I provide after launch support.